Taking your own photos using a phone camera:
It can be daunting to take great shots of your food, however it’s easier than you think. Drool-worthy photos will bring your menu to life and can influence your guest's ordering decisions.
To take your own photos, all you’ll need is an Iphone or an Android.
Tip #1: Use natural lighting (avoid using flash)
Tip #2: Make sure plates are clean
Tip #3: Keep the background tidy & remove any visibility of table edges
Now tilt the phone from portrait to landscape mode.
With the food centred in the frame, hold the phone slightly tilted down and take the photo.
Adding Product and Category images:
We recommend adding images to all new products you create after the initial me&u photography session. Below are instructions to add an image to an individual product and also a category.
Adding an individual product image:
Click Catalogue, then Products then use the search bar to find the product
Click the Product and scroll down to Image. Note the maximum size, file type and dimensions, some resizing may be needed to ensure images do not become stretched out.
Upload your image and save the changes. Be sure to publish!
Adding an image to a category:
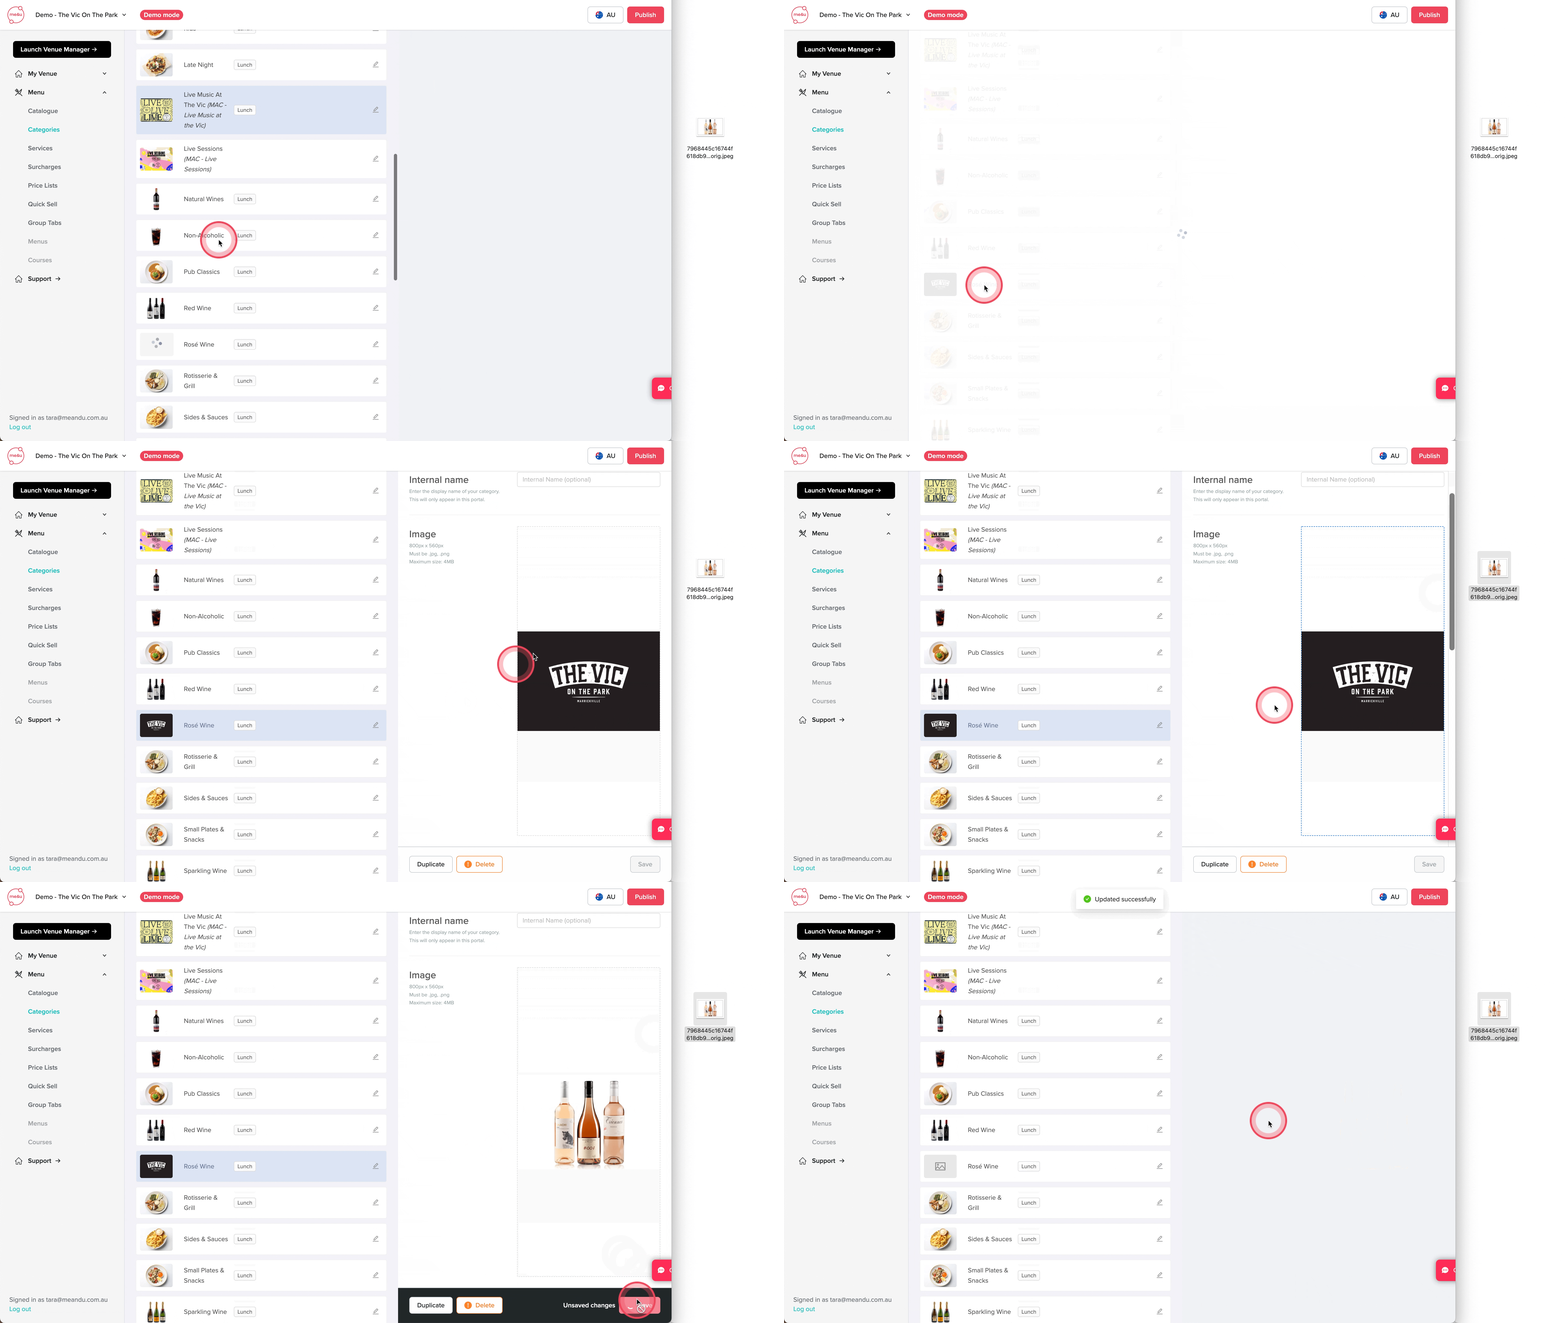
Click the Menu dropdown, then Categories and select the category. Scroll down in the Category details to find Image
Upload the desired high-resolution image and save the changes. Be sure to publish!